Showing posts with label kitchen. Show all posts

Wednesday, June 11, 2014

Making Butter

Going through the Little House series, we read about Ma making butter. I realized it had been a while since we made butter, when none of the littles remembered doing it. So, we decided to make some ourselves. We don’t have a butter churn, so, we got some cream and a jar, and started shaking.


You can see that the kids are wearing the required homeschool uniform – PJs.


They took turns shaking. I helped a little. And, when they got that solid clump of butter floating in the buttermilk, just like the Little House description, they were really excited!


There it is. Beautiful homemade butter floating in buttermilk.


Next step was to strain off the buttermilk. We just poured it in a colander over a glass bowl. Look at those proud faces.


And, look at that lovely lump of butter.


They rinsed the butter until the water ran clear, just like Ma.


 Time to drink the buttermilk. They weren’t too impressed with that.


 Time to mix in the salt.


We packed the finished product in the butter bell. That’s as close as we get to butter molds.


What better way to enjoy freshly made butter, than on a piece of toast. Yum!


The only improvement on that would be to read Little House on the Prairie while eating toast with homemade butter.


Wednesday, April 23, 2014

Color Coded Dishes

I’ve been a member of the MOMYS (Mothers of Many Young Siblings) email groups for many years. It has been a lifesaver for me many times. There are several very simple tips I have learned to help out with the everyday chaos of raising a big family.  One of those is color coded dishes. Back before I color coded my dishes, I often had the issue of kids leaving their dishes out on the table or counter, instead of putting them in the dishwasher. And, inevitably, no one knew whose dish it was. Or should I say the dishes belonged to the ever elusive Not Me.

For our dishes, we chose Fiesta ware. Since, this company has been around for a long time, I know that I can get replacement dishes, when necessary. Being a little OCD, I like to know I can get the same dishes, so my stack of dishes doesn’t look mismatched. Breakage is certain to happen, but even with tile floors, it doesn’t happen too often. When we had preschoolers, they used plastic plates. Now everyone has ceramic plates, but I do keep some plastic plates in stock for guests.


For a long time, we used plastic drinking cups – usually Tupperware, because, again, I knew I could replace the cups. But, we are using plastic less and less, so this is our new drinkware. I tried several things to distinguish one glass from another.  I used little stick on drink charms, but they didn’t stay well. Rubberbands were too hard to find in different colors. So, I ordered drink bands from www.drinkbands.com  They work great. We just leave them on the glass and put it in the dishwasher at night, so everyone’s clean glass is ready to go in the morning. The glasses on the left are clean because those kids spent the night at Grammy's and haven't been home all day. The ones on the right are dirty, and I didn't feel like washing them for the picture. Just being real. :)


 With preschoolers, I used a silicone case for the small mouth 8 oz mason jar. These are made for baby bottles, but they fit great on those 8 oz jars. http://www.amazon.com/gp/product/B003SRJTXQ/ref=wms_ohs_product?ie=UTF8&psc=1  And, they saved the jars from many a fall onto the ceramic tile in our great room.

So, now I know who left their dish on the table so they can take care of it. And, we know whose cup is whose, so we minimize the number of cups used each day.  Just one of the little things that makes my life easier.


Tuesday, April 1, 2014

Get the Leaven Out

Seven days you shall eat unleavened bread. On the first day you shall remove leaven from your houses. For whoever eats leavened bread from the first day until the seventh day, that person shall be cut off from Israel. (Exodus 12:14-15)

Today, we began preparations to have leavening out by Passover.  As I mentioned in yesterday’s blog post, I don’t spend a lot of time cleaning. I like to plan in advance so we don’t have a lot of waste when it comes time to remove the leaven. I start by going through all of our cupboards and pulling out any items that have leavening in them.  I set them on the counter in a crate so everyone can be reminded that they need to be eaten by Passover.  This is the crate I set out today. We have a particularly large amount of goodies because we just went camping last weekend, so we have lots of leftovers.

Then, I go through the refrigerators and freezers. I make a list of leavened items that are in there. When preparing food, I refer to the list to get rid of these items by Passover.  This year, I happen to have a whole, unopened bag of yeast from Costco. Hmmm. Poor planning there. Oh well.


In the meantime, I minimize the leavened products that I buy. We can go through 2 loaves of bread in a couple of days, so I will buy bread up until a few days before. But, I won’t buy bread crumbs (or yeast) or anything that would take weeks or months to use.

Right before our Passover celebration, we throw out anything left in the crate and anything left on the list. I don’t store my leavening at someone else’s home or hang it on the other side of my fence and take it back after the Feast of Unleavened Bread. I throw it away. I get rid of it. I remove it from my life. And, I try to plan it so that I’m not being wasteful. Financially, we have lived in plenty and we have lived in want. But, we have never had difficulty replacing the leavening that we need after the Feast of Unleavened Bread is over. 
Your glorying is not good. Do you not know that a little leaven leavens the whole lump? Therefore purge out the old leaven, that you may be a new lump, since you truly are unleavened. For indeed Christ, our Passover, was sacrificed for us. Therefore let us keep the feast, not with old leaven, nor with the leaven of malice and wickedness, but with the unleavened bread of sincerity and truth. (1 Cor 5:6-8)
A question I always have to ask is, “what is leaven”?  The answer is not so clear cut in today’s world. In Bible times, they made a sourdough type bread. They would save a bit of their leavened dough to use as leavening for the next batch they made.  They didn’t have instant yeast (So, they wouldn’t have to throw away a whole Costco sized bag.) or baking powder. 

So, what do I actually need to get rid of? I don’t get rid of flour or grain. I have no problem keeping rice or pasta. They don’t puff up. They swell up with the water they are cooked in. I had actually never even heard of getting rid of that for Unleavened Bread until the last several years. I used to get rid of cream of tartar (church rules), but since that does not leaven on it’s own, I don’t get rid of it anymore. I will make and eat angel food cake. That is just air whipped into eggs. If you leave it on the counter unbaked for long enough, the air bubbles will deflate. True leaven will puff up when left alone on the counter. So, I have wondered for years if I should get rid of baking soda and baking powder. I’m not sure that is a true leavening. If I make a cake batter and let it sit on the counter, the “leavening” action will dissipate. So, again, this is not a true leaven. For now, I still get rid of baking soda and powder and foods made with it. So far, I have erred on the side of caution for this one.

So, I get rid of leavening agents – yeast, baking powder, baking soda – and any products made with those leavening agents. That’s pretty simple. Whatever you decide to get rid of, read the labels of the foods you have in your home. You would be surprised how many products contain leavening. Stuffed pasta usually contains bread crumbs. Grape Nuts, though hard as a rock, contain yeast. (At least they did 20 something years ago when we sat down to eat it for breakfast during the Feast of Unleavened Bread.) Don’t forget any candy you have with cookies in it, like Twix, Kit Kat or Ferrer Rocher. (When you buy a big box of this as Passover treat, you will need to eat it beforehand when your kids read the ingredients. Ask me how I know.)

Removing leaven is an object lesson, and a great one, at that. Leaven pictures sin. We want to get it out of our life – completely. We don’t want to tuck it away just to bring it back in later. We don’t want to hold onto it because it might cause financial hardship. It’s everywhere. Sometimes it’s obvious. Sometimes it’s well hidden.

We have found that when I stay home, I find it easy to avoid leaven. (Although, no matter how hard I try, I always find some leavened product or child's leftovers that I didn't get rid of.) We don’t have it in our house, so, I would have to make an effort to eat it. As my husband goes out in the world to earn a living, he has a much harder time remembering. It’s everywhere, and the world doesn’t think twice about partaking. When he goes to his supplier to get materials for a job, there are donuts sitting out. When I didn’t send breakfast and lunch with him, it was way too easy to stop and get a bagel or a sandwich without even thinking about it. Just a reminder that when we surround ourselves with righteousness it is easy to live in obedience, but, when we are in the world, we have to be on guard because it is always a battle.

So, when God asks us to remove the leavening from our home, it’s not a hardship. It’s a lesson. It is many lessons. Every year there is something new to be learned. And, we have the added bonus of having a clean pantry.


Tuesday, October 23, 2012

Breakfast in a Jar

Several months ago, we downsized our 15 passenger van to a minivan. It cut our gas bill tremendously.  But, it also gave us a car payment.  We brainstormed ways to cut our expenditures elsewhere in the budget to help make up for the new payment.  One of the biggest expenditures we cut was breakfast and lunch for my hubby.  He had been eating out a lot for those meals.  So, we decided he would take breakfast and lunch each day.

One of the most common breakfasts I have been making for my wonderful, hard working man, is breakfast in a jar.  http://www.theyummylife.com/Refrigerator_Oatmeal These are so delicious.  I often whip up a batch on Sunday afternoon, and he has breakfast ready for the whole week.  Yes, I make them that far in advance, using raw milk. He likes to grab breakfast, pack his prepared lunch and head out the door.  He eats breakfast on the way to work.

This week, I got a little lazy and made a quick breakfast parfait with yogurt and frozen fruit.  I know he likes granola with his yogurt, but we were out last night.  So, I made some this afternoon.  When I make granola, I make a big batch.  Three large cookie sheets full. (Sorry, the picture is a little blurry.)


Then I whipped up this jar of breakfast parfait.  Honey Greek yogurt, frozen berries and granola.  Maybe he'll like this even better than this morning's version.


And, now the kids can eat granola for breakfast, too.  Cereal is a treat around here.  It disappeared quickly with the budget cuts. 

Now, I need to come up with some more interesting lunch ideas.

And, here is my granola recipe.  I cook it at low heat to keep it healthier.  One of my sons doesn't like it that way.  He says it's not crispy enough.  But, I think the health benefits are worth it.

                  
                                 Granola

  Amount  Measure       Ingredient -- Preparation Method
--------  ------------  --------------------------------
  10              cups  rolled oats or combination of grain flakes
  1                cup  wheat germ
  2               cups  shredded coconut
  2               cups  slivered almonds
  2               cups  sunflower seeds
  1                cup  sesame seeds
     3/4           cup  honey
     3/4           cup  maple syrup
     1/2           cup  coconut oil
  1                cup  sugar, rapadura or brown
  2          teaspoons  vanilla
  2          teaspoons  cinnamon
  1           teaspoon  salt

Combine all grains and seeds.

Mix remaining ingredients in a small saucepan.  Warm gently on stove until coconut oil is melted.

Pour over mixed grains and seeds. Mix well.

Spread on 3 large cookie sheets. 

Cook at 145* for 3 hours.


Sunday, February 5, 2012

The Pretty Stuff is Up!

Disclaimer:  These are the “House Beautiful” pictures J  I did move several things off the kitchen counter to make the pictures look better.  So, if you show up at my house, the kitchen will look great (even if it is messy), but you won’t likely ever see it look like this J

We’ll start with the full kitchen view.


We finally got the pretty stuff up.  After they touched up the paint last week, we were ready to put the pretty stuff back up in the kitchen.  I’ve had the teacup holder up in the kitchen for years.  My friend (and much needed advisor for interior design) painted it and I put on new ribbon and flowers.  We have the same tea cups, but I think I’m going to change one out when I find just the right replacement. 


The bay window looks great.  I made a new valance to add a little color. ($7 for a yard of fabric from the fabric store and 15 minutes of sewing.) It’s light green with white polka dots. And, I love the crystals and tea trinkets that are hanging from the window sill. The flowers hanging from the curtain rod are oregano blooms from my garden.  I need another bouquet to hang from the other side. 


We distressed the frame to the left of the window sill.  Actually, we ended up distressing a lot of frames that day.  It was great. Most of them are in different areas of the house, so you won’t see pictures here.  The kids wanted to help and when you paint on the white, it doesn’t actually have to be done well.  So, even the 4 year old was helping.  Then the bigger kids and I did the distressing. 


And, here’s a view of the full wall.


On top of the oven is a basket of our everyday vitamins.  It looks really cute and they’re easy to access.


And, here’s a snazzy feature.  The granite guys took the piece that they cut out for the cook top, cut it into two pieces, polished the edges and made cutouts on the bottom to make it easy to pick up.  I usually leave one on my counter.  But, when we have lots of people over for potlucks and such (which is usually at least twice a month), I can put the pieces on the cooktop and make more counter space.  It’s awesome!


I went to the open-air antique market today for some finishing touches.  I found this cute little thing. I’ll have to put some flowers in it. 


I also found this milk bottle from 1947 to add to my lineup.  I like the pink tint it has.


And, last but not least, I found a saucer to use as a spoon rest.  I want a couple more for the other counters in the kitchen. I’ll have to keep looking until I find just the right plates at just the right price.  I can get a beautiful saucer for cheaper than a spoon rest from Target. And, I couldn’t resist the cute little salt shaker with glass beads in it.  I found them in a shabby chic stand at the market today. I loved that stand.


So, that’s it for the kitchen blogs.  I feel so blessed to have this awesome kitchen and my wonderful  husband who pulled it all together.  And, I’m looking forward to sharing it with many people in the years to come.


Monday, January 23, 2012

Almost Finished!

The kitchen is now done, except for touching up the paint and putting the pretty stuff back up on the walls.  So, here is the House Beautiful photo shoot of the kitchen.  Trust me, it won’t look like this for long J These two photos show the big picture. Notice the subway tile backsplash and the chair rail, which wasn’t in before now. 


I have more space to store things in the kitchen, and a lot more counter space, so the counters are much clearer than they used to be.


This is the new working counter I’ve been so excited about.  Plenty of space to bake, prepare pizza and plenty of storage underneath for all the supplies. And, any pizza toppings that I’ve prepared on the stove are easy to grab from the pizza prep spot. 


Another view of the mega counter. We scooted the cooktop closer to the wall. It used to have a tiny little ledge next to it that was too small to be functional for anything. Now, it holds cooking supplies or the plate of heated tortillas for burritos quite easily.


This counter we extended and we added the cupboard at the end. That cupboard now houses the trash can. The trash can is much smaller than we're used to, so the kids will need to be emptying it more often. But, it looks great. And, one of those drawers is actually empty at the moment. That's amazing!


A view of the pantry. Yes, that’s two jars of Nutella.  Apparently, one of the kids couldn’t find the open jar (can’t blame them in the mess we had up until now) and opened the 2nd jar. So, we’re forced to eat them both J The LED lights in the pantry turn on when you open the pantry door.  Gotta love having an electrician in the house.


Magnetic switch and lighting from inside the pantry.


Knowing how much we use the sink, we opted for a Moen faucet. A Grohe was definitely out of our budget, but we didn't want to go with a cheap brand. There are some (many, actually) areas of the house that get way more use than the standard 4 person household where everyone goes to work and school during the day.  The sink is one of those.  We cook a lot. When I say cook, I don’t mean we heat things in the microwave.  We don’t even own one, actually. We cook from scratch all day, every day. And, as a result, we wash a lot of dishes.  So, we need a faucet that will stand up to that kind of use.


And now for some detail pictures.

I’m loving the mason jars for storage and for decoration. And, our chickens have been laying lately. Go figure. Chickens laying in January. But, I won’t complain.


Close up of the subway tile backsplash and the cute, yet functional, things on the counter.


Oil rubbed bronze hinges and drawer pulls.


Close up of cupboards and beadboard decoration. With the beadboard decoration and the great paint job, you would never guess that these cupboards were built in different decades.


The cutting boards were hard to grasp and pull out, so dh added some cute little drawer pulls to them to make it easier.


I must say, I love the granite.  It’s so beautiful. And, what counter is complete without a jar of olive oil.


LED under-cabinet lighting.


Dh also put the LED lighting in the storage pantry under the stairs. Plus, he added a couple of shelves on the wall.  They just happen to perfectly house my 1 gallon buckets.  I love the buckets, but I have to find a cuter way to label them.


And, the working counter that I’ve been raving about perfectly houses all my baking supplies. The drawers have spices on the left (which now need to be labeled on top), basic baking stuff in the middle and rarely used stuff on the right.


The cupboards hold ingredients on the left , small appliances in the middle and rarely used stuff on the right (not pictured).  The Bosch Universal and the grain mill are used many times a week.


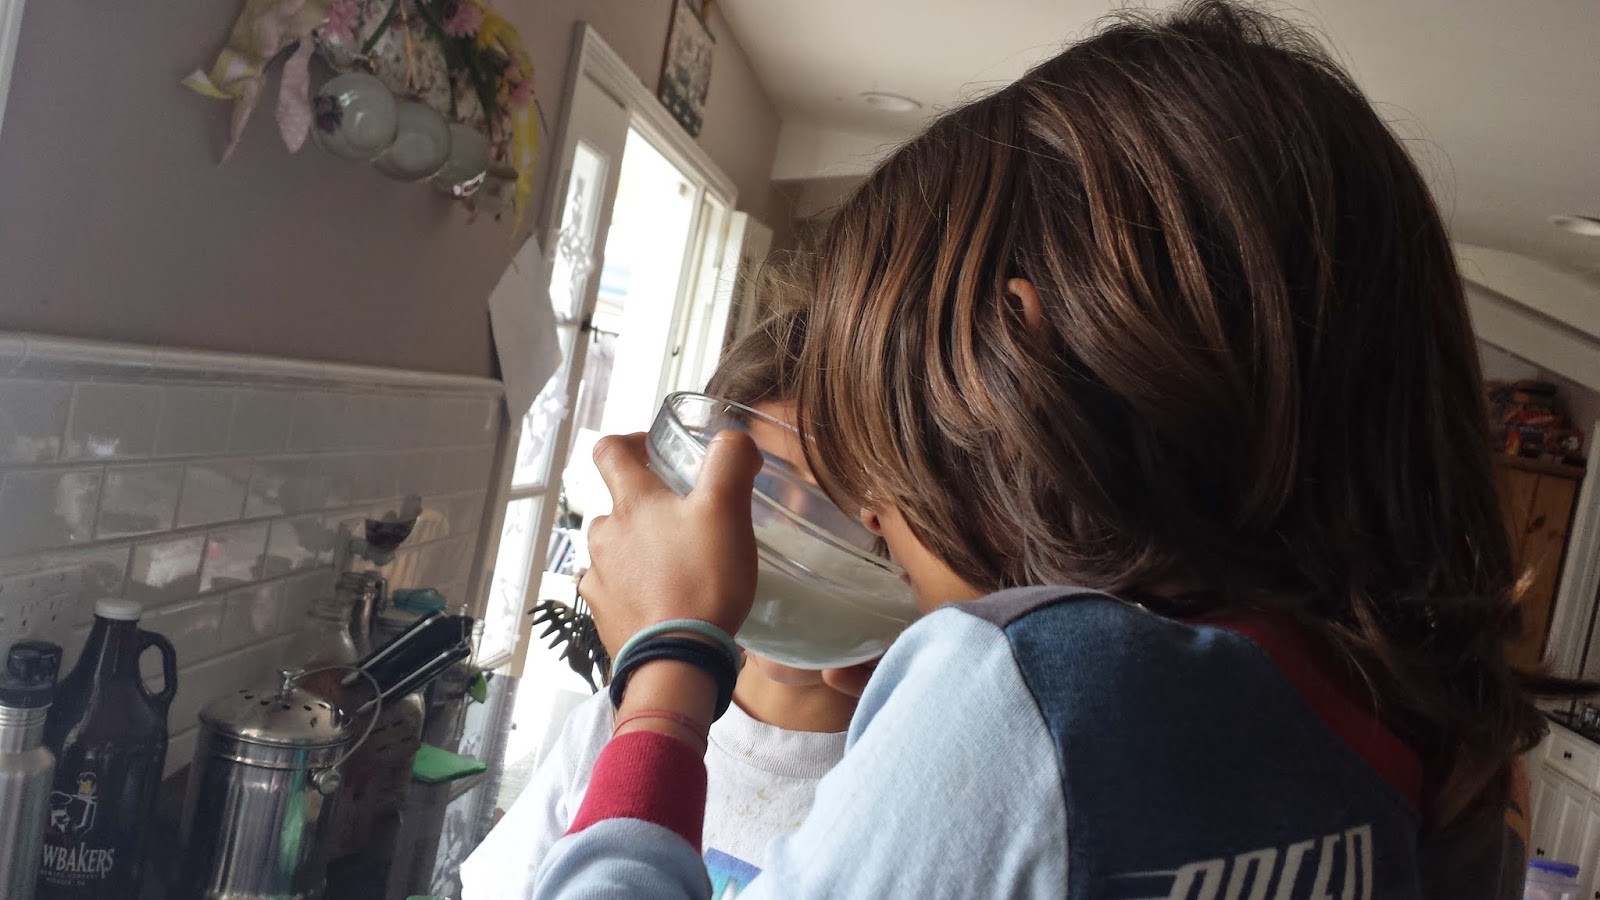
Here is a slightly more realistic picture of the kitchen in use.  The two little guys are helping me cook pizza for a birthday dinner.


And, since I have so much counter space, this counter is completely clear while we’re cooking pizza! This used to be my pizza prep spot and it was quite crowded. This time I used this counter for serving the pizzas when they came out of the oven.


I’ll do one more blog post on the kitchen remodel after the paint is touched up and the pretty things are back in place.